Configure Windows to use static and dynamic IP at the same timeTo configure your computer (tested on Windows 2000, Windows XP and Windows Server 2003) to use both a DHCP obtained IP address and a statically configured IP address follow these steps:Configure your computer to use DHCP1. Right-click My Network Places and choose Properties. 2. On the NIC that is (usually) labeled as Local Area Connection - right-click and choose Properties. 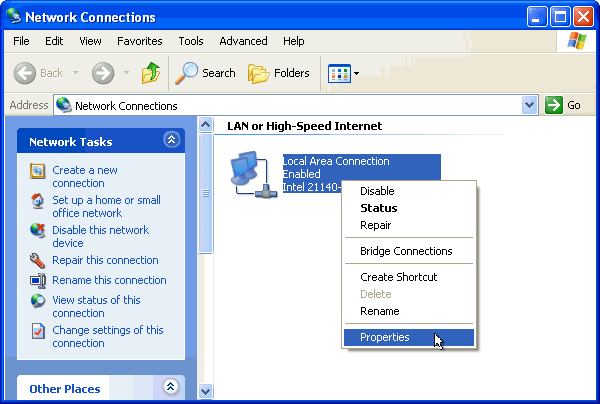 3. Select TCP/IP (make sure you don't remove the check mark accidentally) and press the Properties button.  4. Make sure you have "Obtain Automatically" selected.  5. You can verify your settings by running ipconfig /all at a command Prompt:  6. Ok all the way out. Add a second (or third and so on), static, IP address1. Click Start and choose Run. Enter Regedit and press Enter. Note: On Windows 2000 and NT you need to run Regedt32 instead. 2. Navigate to HKEY_LOCAL_MACHINE\SYSTEM\CurrentControlset\Services\Tcpip\Parameters\Interfaces\{B003AD4A-B6DB-44FD-9741-CBA3C51B6498}
(actual GUID of the NIC may vary, select the one that represents your own NIC (from step 2 above)3. Select the IPAddress key and double click it. 4. In the Edit Multi String dialog box enter a second (and third and so on) IP address. Make sure you enter each IP on a separate line. Click Ok. 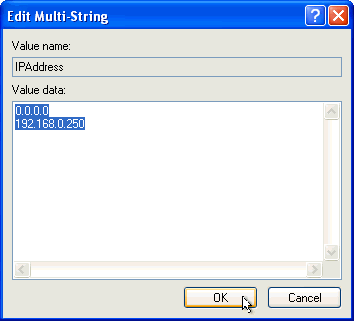 5. Select the SubnetMask key and double click it. 6. In the Multi String dialog box enter a second (and third and so on) Subnet Mask. Make sure you enter each Subnet Mask on a separate line. Click Ok.  7. Close the registry editor. 8. Go back to your network properties, right-click your NIC and select Disable. 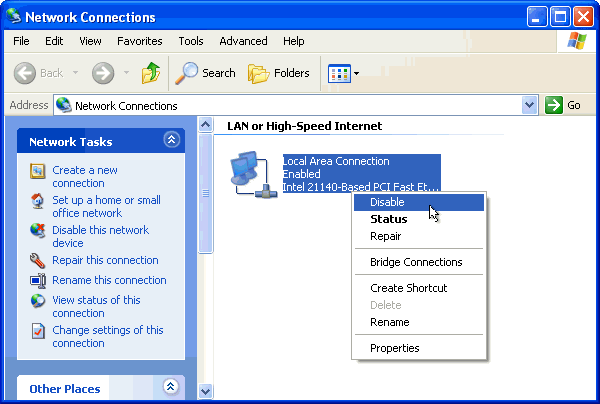 9. Right-click you NIC and select Enable.  10. Verify your settings by running ipconfig /all at a Command Prompt: 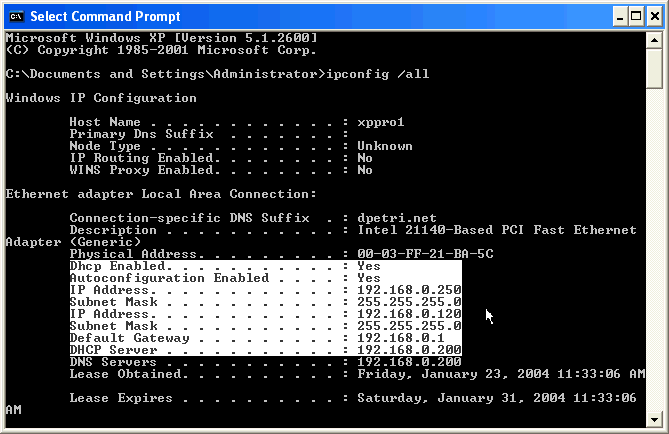 Done! |